Setting up the Language Translation Database
This will require Admin access.
Setting up the Master and Regional Libraries
- Ensure that Process Navigator version 18.1.13 or later and Triaster Server version 18.1.45 or later are installed.
- Either choose a library or clone a library to use as the Master Library, e.g. English BMS
- Clone the Master Library to create Regional Libraries e.g. French BMS and Italian BMS. Repeat as many times as necessary depending on the number of regional libraries required.
Changing the Settings XML file
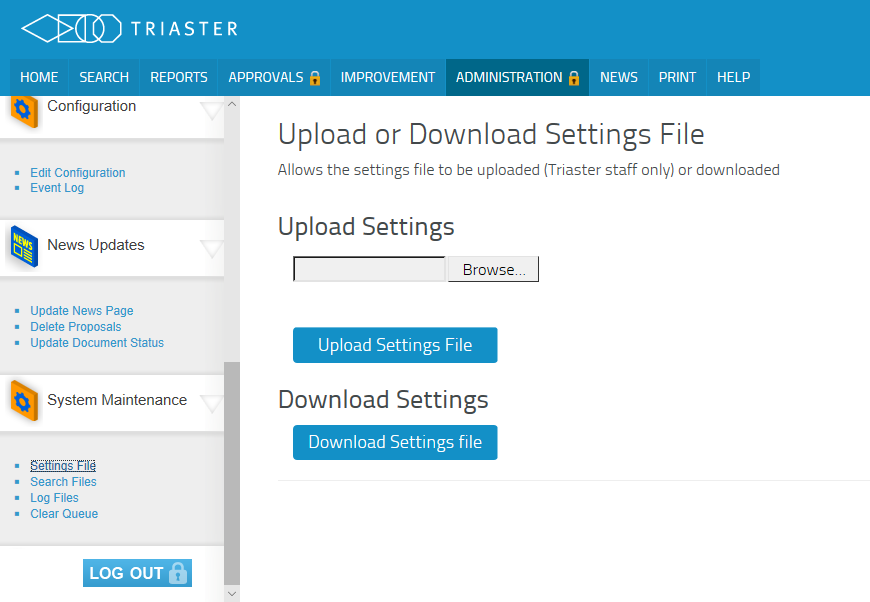
- First the Settings file will need to be downloaded, this can be done via the admin page on the Master Library. Scroll down the left bar on the page and look for System Maintenance and click Settings file from the list. Then click the Download Settings file button and then the Settings file will be sent to the downloads folder in File Explorer.
- Edit the settings file (in Notepad++ or a similar program) to contain:
<MultiLanguage> <ProcessMultiLanguage>True</ProcessMultiLanguage> <MasterLibrary>English BMS</MasterLibrary> <CopyModifiedFilesOnly>False</CopyModifiedFilesOnly> <RegionalLibrary> <LibraryName>French BMS</LibraryName> <Language>French</Language> </RegionalLibrary> <RegionalLibrary> <LibraryName>Italian BMS</LibraryName> <Language>Italian</Language> </RegionalLibrary> <LTD>[your file path here]</LTD> <SearchXPath>//Activity/Name | //Deliverable/Name | //Node/Name | //Decision/Name | //HyperlinkCircle/Name | //FeedbackEmail/Name | //Lane[Width>0]/LaneText</SearchXPath> </MultiLanguage> - Save the new settings file and then upload it. This can be done by visiting the Admin page and navigating to the System Maintenance and click Settings file from the list. Browse to the new Settings file, then click Upload Settings File to upload it. This will apply the new code.

Settings File Admin page
This can be placed anywhere in the Settings file as long as it is a direct child of <Settings>.
NOTE: The Master and Regional library names will have to be changed depending on their names and the file path will have to be edited to wherever the user wants the Language Translation Database (LTD) spreadsheet to be.
The effect of this section is that following a Live publish of the English BMS, the maps are copied to the regional libraries, the Language Translation Database is updated with any new strings to be translated, and a translation Load Time Action is added to the map so that when it is next loaded the objects in the map are translated. Since only Live maps are copied, they are already approved and their approval status goes with them.
How to add another language
- Clone either a sample library or one of your regional and master libraries and name it appropriately e.g. German BMS.
- Navigate to the Settings.xml file that was changed above. Right click to edit the Settings file (in Notepad++ or something similar) and look for the <MultiLanguage> tag. Use Ctrl F to help search.
- Copy one section of code containing and including the <regional library> tags, e.g.
- Paste this section of the code directly under a </RegionalLibrary>, rename the <LibraryName> tag to your newly made process library name and the <Language> tag to whichever language is being translated to, as shown in bold.
- Save the new settings file and then upload it. This can be done by visiting the Admin page and navigating to the System Maintenance and click Settings file from the list. Browse to the new Settings file, then click Upload Settings File to upload it. This will apply the new code.
- Everything should be in working order so give the new library a test to see if it works as normal.
<RegionalLibrary>
  <LibraryName>French BMS</LibraryName>
  <Language>French</Language>
</RegionalLibrary>
<MultiLanguage>
   <ProcessMultiLanguage>True</ProcessMultiLanguage>
   <MasterLibrary>English BMS</MasterLibrary>
   <CopyModifiedFilesOnly>False</CopyModifiedFilesOnly>
    <RegionalLibrary>
      <LibraryName>French BMS</LibraryName>
      <Language>French</Language>
    </RegionalLibrary>
    <RegionalLibrary>
      <LibraryName>Italian BMS</LibraryName>
      <Language>Italian</Language>
    </RegionalLibrary>
	<RegionalLibrary>
      <LibraryName>German BMS</LibraryName>
       <Language>German</Language>
    </RegionalLibrary>
   <LTD>[your file path here]</LTD>
   <SearchXPath>//Activity/Name | //Deliverable/Name | //Node/Name | //Decision/Name | //HyperlinkCircle/Name |
   //FeedbackEmail/Name | //Lane[Width>0]/LaneText</SearchXPath>
</MultiLanguage>
Short explanations of the code
| <ProcessMultiLanguage>True</ProcessMultiLanguage> | This tells the Triaster software whether to translate or not. Set to true if this is not already the case. |
| <MasterLibrary>English BMS</MasterLibrary> | This is where you would input the name of the master library that the maps will be translated from. |
| <CopyModifiedFilesOnly> | When set to False this will copy every map in the master library to the regional libraries every time. When set to True this will only copy over new maps or maps that have been modified. |
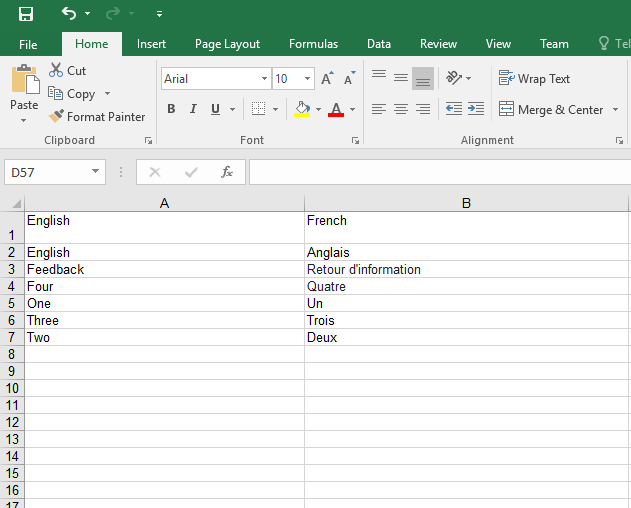
| <RegionalLibrary> | The regional library tag contains the <LibraryName> tag, which is where you would enter the name of your regional library. It also contains the <Language> tag, which is where the name of the language being translated to is input. This is what populates the head of the column on the excel spreadsheet. |
| <LTD>[your file path here]</LTD> | This is where you would input the file path to your Language Translation Database (LTD) excel spreadsheet. If there is no file in the target location one will be made. |
| <SearchXPath> | This is where the shapes that need to be translated are input. For example you can see the activity and deliverable shapes in here. |
Setting up the Excel Spreadsheet
There is not much set up required for the excel spreadsheet other than to make sure that the file path is correct inside the
<LTD>[your file path here]</LTD> tag.
It is best practice to name the top row of each column based on which language that row is.
